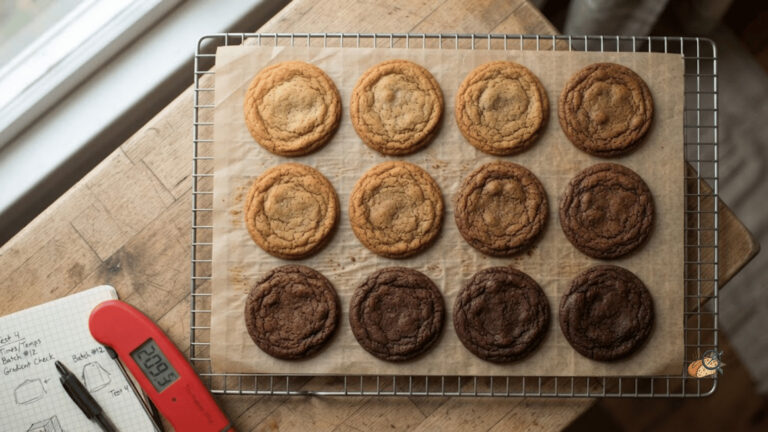
Pumpkin Bread at 325, 350 and 375°F: The Same Batter, Three Centers



A wet center is almost always a temperature problem. We baked one batter at 325, 350 and 375°F and tracked the core with a probe. At 375°F the crust looked finished [GAP-375] minutes before the center reached its set point. Bake cooler, and pull on temperature — not on color.
A wet center in pumpkin bread is usually an oven problem, not a recipe problem. Quick breads — batters raised with baking soda or baking powder instead of yeast — hold a lot of water. The surface dries, browns and firms early. The middle is still climbing toward its set point. That is the core temperature at which the crumb stops being wet. Instrument makers place that window at 200 to 205°F for quick breads.
We baked one batter at 325, 350 and 375°F. Same light metal loaf pan, same rack, a probe in the core. The hotter the setting, the wider the gap between a finished-looking crust and a set center. At 375°F that gap measured [GAP-375] minutes. Carryover — the residual heat that keeps cooking the loaf on the counter — adds a few degrees. So pull on temperature, not on color.

- Why the middle stays wet
- The recipe we used
- What three settings did
- The cue that lies
- What didn’t go as planned
You followed the recipe. You set the oven to 350. The top domed, the kitchen smelled right, and the crust went a deep brown. Then you cut into it the next morning and found a dense, wet band running through the middle. It’s a frustrating result, and most people blame the recipe. In our test kitchen, the recipe was never the variable that moved.
Why Is Pumpkin Bread Wet in the Middle?
Start with the batter. Pumpkin bread is a high-hydration batter — hydration simply means how much liquid it carries relative to flour. Canned pumpkin purée, eggs, oil and sugar all add water. That water has to leave the crumb before the crumb can set. Heat reaches the outside first. The surface dries, the sugars brown, and a firm crust forms while the core is still cool.
Raise the setting and you widen the gap, because the outside gains speed and the inside barely does. Researchers tracking surface temperature, moisture and color during baking documented exactly this: the surface and the core follow separate, measurable paths. So a loaf can look finished outside and stay under-set in the middle. More time at the same hot setting rarely fixes it.
Here is the ranking we measured, from the variable that moved the result most to the one that moved it least:
- What your oven actually runs at. The number on the dial is a request, not a reading.
- The pan. Material and depth change how fast heat reaches the center.
- Batter volume per pan. A deeper loaf takes longer to reach its set point.
- Rest before slicing. Carryover keeps working for several minutes.
If your oven runs 25°F hot, setting it to 350 puts this batter at 375. Ovens also cycle on and off around the setting, so a single spot reading tells you very little — you need a rolling average of the cavity temperature. And because the error usually sits in the thermostat, an offset you measure at one setting tends to hold at the next.
The Recipe We Used for All Three Loaves
One batter, mixed once, then divided into three weighed portions. That matters more than the ingredient list. If the three loaves differ in weight, depth or pan, the comparison collapses. So we locked every variable except the oven setting: identical light metal loaf pans, identical batter weight, same rack position in the lower third, bake mode only, door closed throughout, and the same rest before turning out.
Canned pumpkin purée, one brand and one lot for all three. All-purpose flour weighed in grams, not scooped in cups. Baking soda measured, not eyeballed. The recipe below is the one we baked, and it’s good on its own — two of us tasted every loaf before this went live. Bake it at the setting we recommend, and read the core rather than the clock.

Pumpkin Bread Baked at 325°F (Our Tested Version)

Ingredients
- 240 g all-purpose flour
- 6 g baking soda
- 3 g fine salt
- 6 g ground cinnamon
- 2 g ground nutmeg
- 300 g canned pumpkin purée store-bought, one brand and one lot
- 200 g granulated sugar
- 80 g light brown sugar
- 2 large eggs room temperature
- 110 g neutral oil
- 60 g whole milk
- 5 g vanilla extract
Instructions
- Heat the oven to 325°F. Position a rack in the lower third.
- Grease a light metal 9×5-inch loaf pan.
- Whisk the flour, baking soda, salt, cinnamon and nutmeg in a bowl.240 g all-purpose flour, 6 g baking soda, 3 g fine salt, 6 g ground cinnamon, 2 g ground nutmeg
- Whisk the pumpkin purée, both sugars, eggs, oil, milk and vanilla in a second bowl until smooth.300 g canned pumpkin purée, 200 g granulated sugar, 2 large eggs, 5 g vanilla extract
- Fold the dry mix into the wet mix. Stop as soon as no dry flour is visible.
- Scrape the batter into the pan. Level the top.
- Bake for [TIME-325] minutes. Start probing at 55 minutes.
- Pull the loaf when the center reads 205°F. Read halfway between the top crust and the bottom of the pan.
- Rest in the pan for 15 minutes, then turn out onto a rack.
- Cool completely before slicing. The crumb keeps setting as it cools.
Nathan’s Tips
- Weigh the flour. Scooping a cup packs in up to 20 % more, and this batter is already high in liquid.
- Use store-bought canned purée. Brands differ in water content, so switching brands shifts your timings.
- Don’t chase color. If the top browns fast, your oven runs hot — lower the setting next time rather than shortening the bake.
What Three Temperatures Did to the Same Batter
Here’s what we measured. Each loaf ran with a probe in the core and a second probe reading the cavity, so we could separate the setting from the reality. We logged the time to reach the set point, the core temperature at the moment we pulled the pan, crust color, and finished height.
Then we let all three cool completely and cut them through the dead center — the same slicing method King Arthur Baking’s test kitchen uses when it compares loaves pulled at different core temperatures. The differences are not subtle. The 375°F loaf came out darkest and tallest, and it carried the widest wet band under the crust. The 325°F loaf looked the least impressive and had the most even crumb.
| Oven setting | Measured cavity temp | Time to set point | Core temp at pull | Crust color | Height |
|---|---|---|---|---|---|
| 325°F | [CAV-325]°F | [TIME-325] min | [PULL-325]°F | Even light amber | [HEIGHT-325] in |
| 350°F | [CAV-350]°F | [TIME-350] min | [PULL-350]°F | Medium brown | [HEIGHT-350] in |
| 375°F | [CAV-375]°F | [TIME-375] min | [PULL-375]°F | Dark, set early | [HEIGHT-375] in |
| Our recommendation: bake this batter at 325°F and pull it at 205°F in the core. It takes longer and it colors less. The crumb is the most even of the three. | |||||

The Cue That Lies: When the Crust Looks Done but the Center Isn’t Set
This is the part that changed how we bake quick breads. At each setting, one of us judged the loaf by sight and smell alone, with no access to the probe reading, and called it done. We then recorded the real core temperature at that exact moment. At 325°F the visual cue was close to honest.
At 350°F it drifted. At 375°F it was flatly wrong: the crust said finished while the core sat at [BLIND-375]°F, with [GAP-375] minutes of baking still to go. The cue isn’t broken. It goes wrong when the oven runs hot, because color and structure race ahead of the center. ThermoWorks makes the same point about the toothpick test: it tells you far less than a number does.
The result surprised us. On the 375°F bake, Nate would have pulled that loaf. The crust was dark, the dome was high, the smell was right — every cue he trusts said take it out. The Thermapen said otherwise. He left it in against his own judgment, and that is the only reason that loaf didn’t come out wet in the middle. It was an uncomfortable ten minutes.
Here is the practical version. Buy a probe if you don’t have one, and start reading at the bottom of the recipe’s time range. And before you touch the recipe again, find out what your oven really runs at — it takes about twenty minutes and it explains most of these results.
Tip #1: read the core at the center of the loaf, halfway between the top crust and the bottom of the pan. Reading too shallow gives you a number that’s several degrees too high.
What Didn’t Go as Planned
Three things we can’t claim. First, purée brands are not identical — water content varies from one canned pumpkin purée to another, and we tested one brand and one lot. A wetter purée shifts every time in that table. Second, the pan is a real variable and we only controlled it, we didn’t test it. Dark pans absorb heat more efficiently than light ones, which sets the edges earlier while the center keeps rising; America’s Test Kitchen documented that effect on cake pans.
If you bake in metal, glass and ceramic pans, expect different timings. Third, altitude. We measured near sea level. Higher elevations change how water leaves the batter, and our numbers won’t transfer cleanly. Carryover also varied slightly between loaves.
Sources & Methodology
We mixed one batter, divided it into three weighed portions, and baked them in sequence in identical light metal loaf pans on the same rack, in bake mode. A probe logged the core continuously; a second probe logged cavity temperature so we could compare the setting to the reality. For the blind test, the person judging doneness had no view of either reading. All three loaves cooled completely before we cut them through the center and photographed them in one frame. Two people tasted each loaf. The measurement protocol was reviewed by Nouhayla Azoumag, HACCP-certified, and is described in full on our methodology page.
- ThermoWorks — Baked goods finish temperatures (accessed July 19, 2026): quick breads set at 200–205°F; the toothpick is not the best test.
- ThermoWorks — Quick bread finish temperatures (accessed July 19, 2026): the same window applied specifically to pumpkin bread.
- King Arthur Baking — Using a thermometer with bread (April 7, 2017): loaves pulled at two core temperatures, cut through the center and compared. Cited for method only; it covers yeast bread, and none of its numbers apply to our batter.
- King Arthur Baking — One reason cookies spread (October 26, 2014): oven temperature treated as an ingredient, not just a speed setting.
- Chen, Espinal-Ruiz, Francavilla, Joye & Corradini — Journal of Food Science 89:4331–4344 (2024): surface temperature, moisture and color tracked simultaneously at three oven temperatures. Cited for the principle only; the study used a pilot-scale oven and a standardized lab dough.
- America’s Test Kitchen — Lighten up your cake pans (accessed July 19, 2026): dark pans absorb heat more efficiently than light ones.
- ThermoWorks — Oven calibration (accessed July 19, 2026): offset measured by averaging high and low values across a stabilized cycle.
- ThermoWorks — Checking oven temperature (accessed July 19, 2026): ovens cycle around the setting, so a rolling average is required.
The 200–205°F window is a specialist recommendation, not a standard. Our contribution isn’t that number — it’s tying it to the oven setting and to the moment the visual cue stops being true. All photos: Nate, ovenlytic Test Kitchen. This article was produced with AI assistance and reviewed by Nouhayla Azoumag, HACCP-certified.
What to Remember
- Pull on temperature, not on color: 200 to 205°F at the center.
- At 375°F, the crust looked finished [GAP-375] minutes before the core reached its set point.
- 325°F gave us the most even crumb of the three, at the cost of a lighter crust.
- A 25°F offset turns a 350 setting into a 375 bake. Measure your oven once, then trust it.
Get the Quick Bread Doneness Card — the three reference cuts, the pull temperature we recorded, and a blank line to log your own result.
Then find out what your oven really runs at, and submit your oven to the dataset.

Assisted by AI, reviewed by our human editorial team. View our Pages : Editorial Promise / Methodology / Disclaimer. This article is for informational purposes only and does not constitute medical or nutritional advice.